Create your own lxplus machine
To create a virtual machine, one can find more information here.
This tutorial shows example using my user name, and my VM name, simply replace by your own choices.
Step 1 : Create a new OpenStack instance
The first step is to create an instance using the OpenStack service at CERN. From this website, click on 'Instances'.
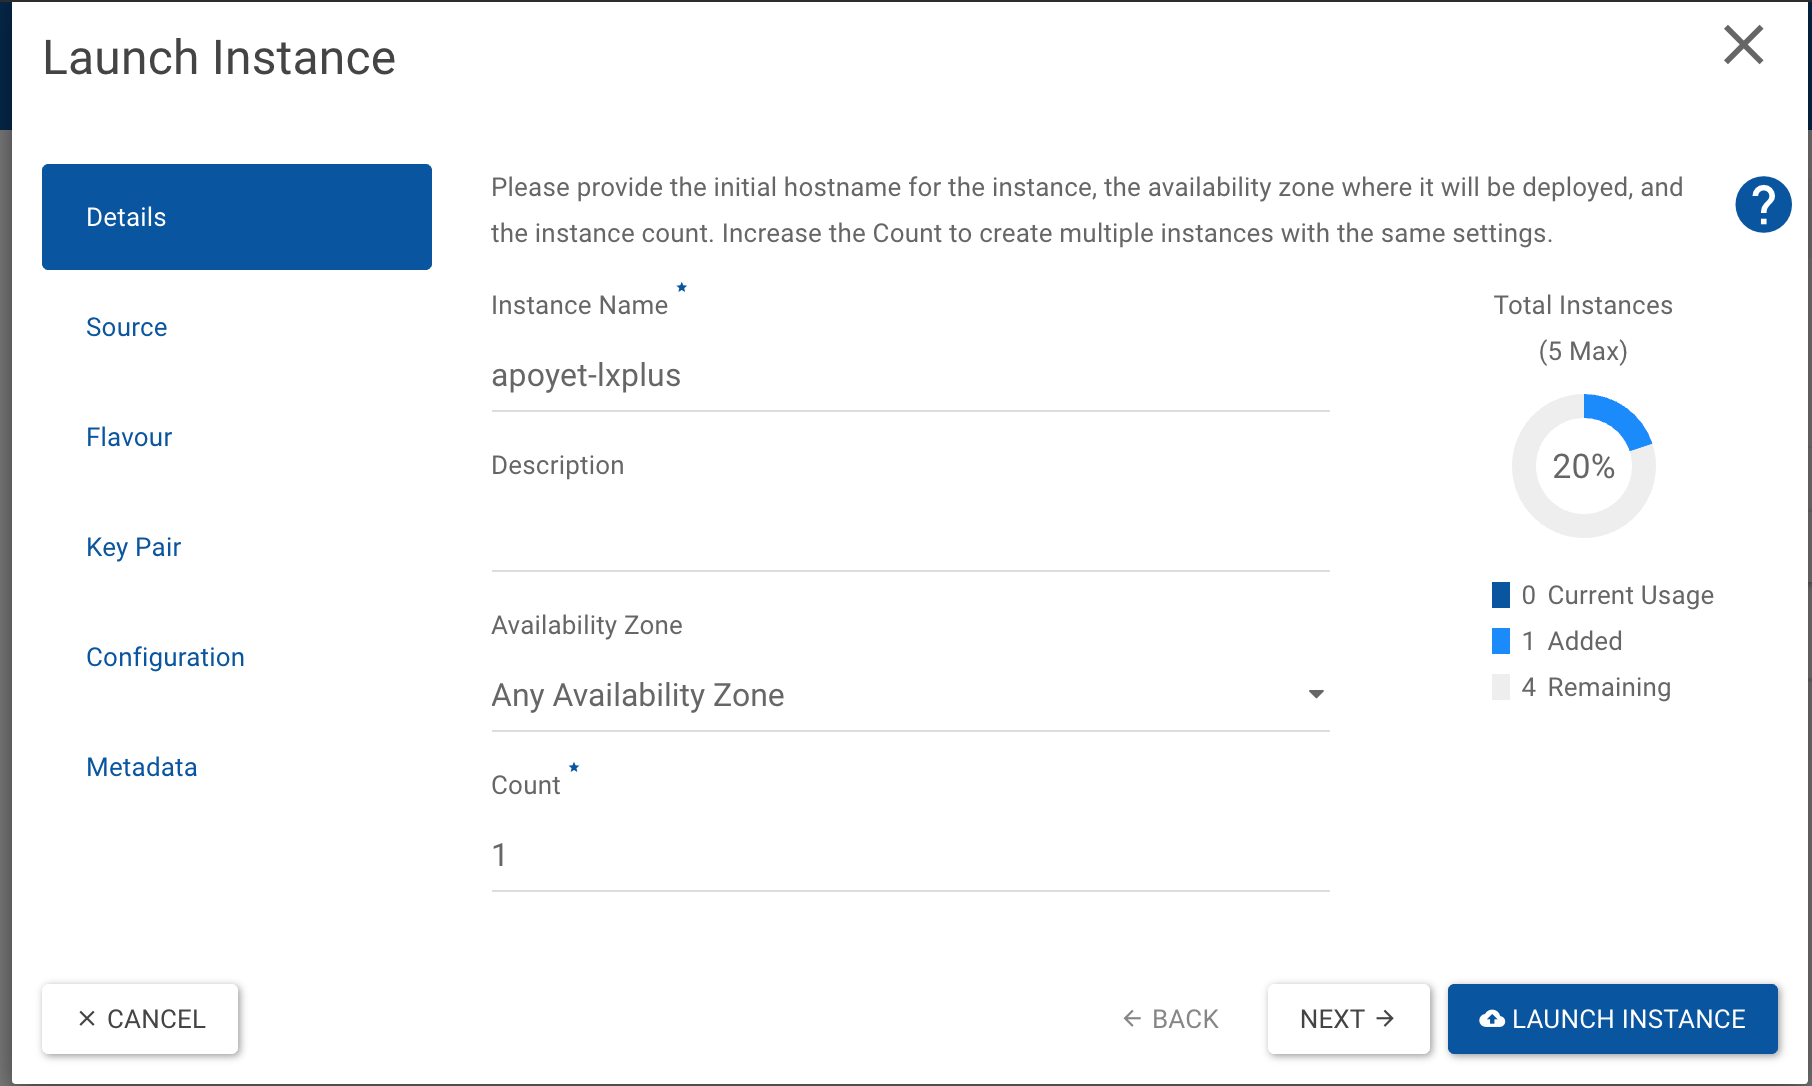
Set the details of your machine
Simply choose a name that will be convenient for you.
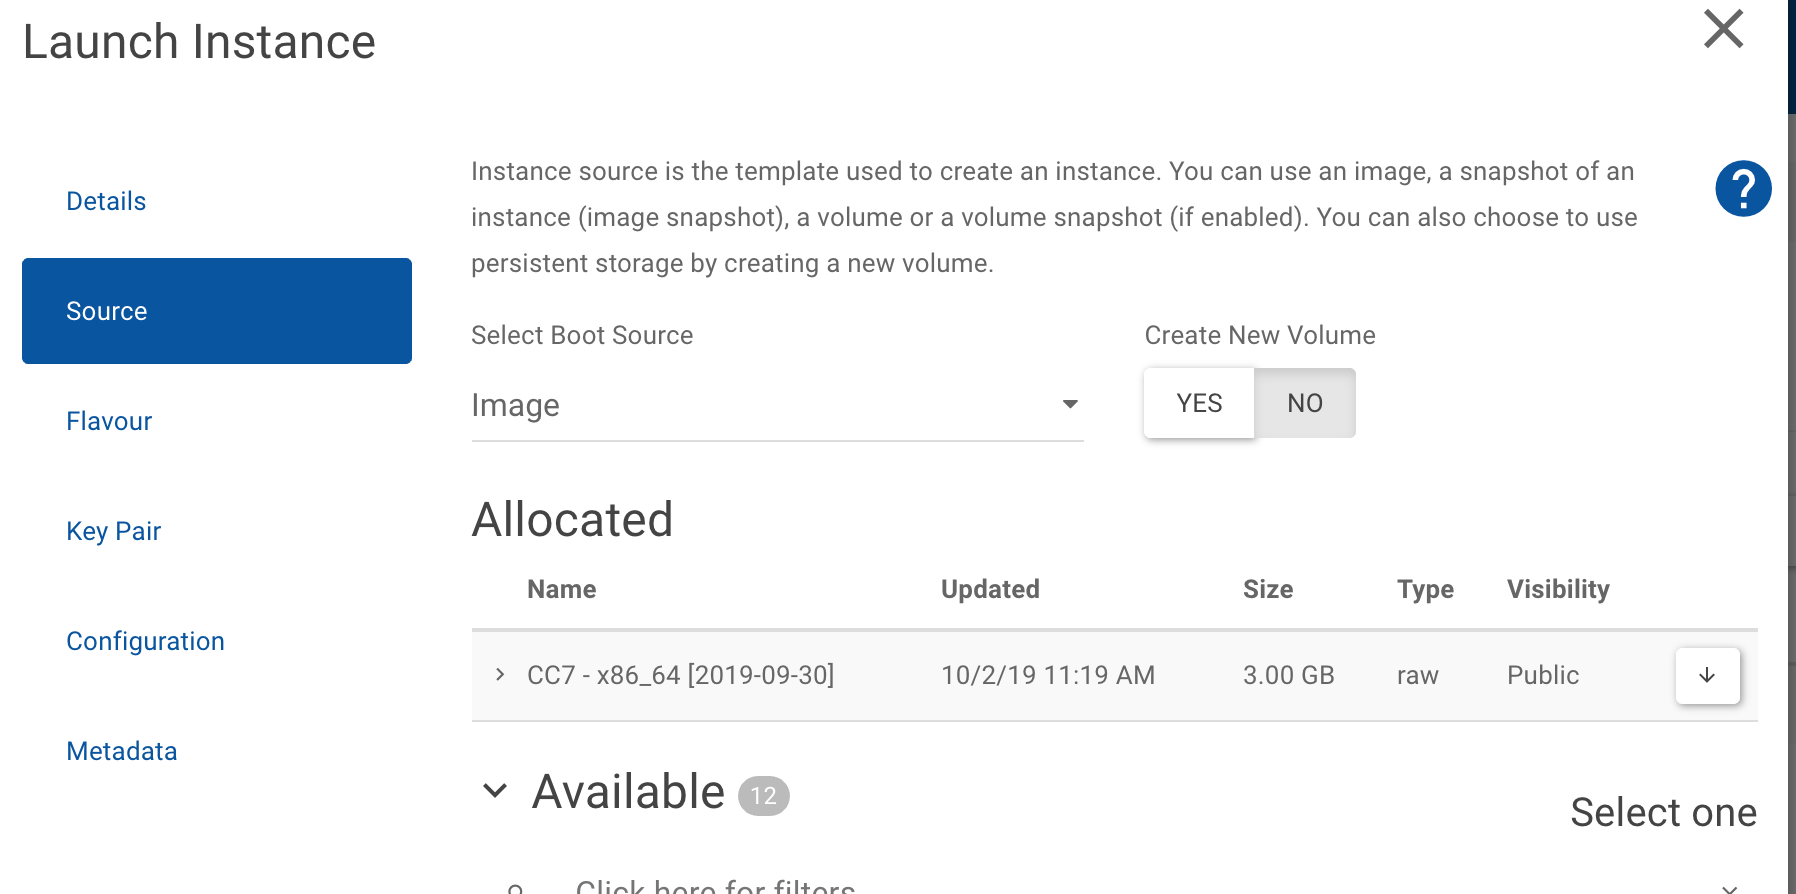
Choose a source
We recommend to choose as source an image of the CC7 OS.
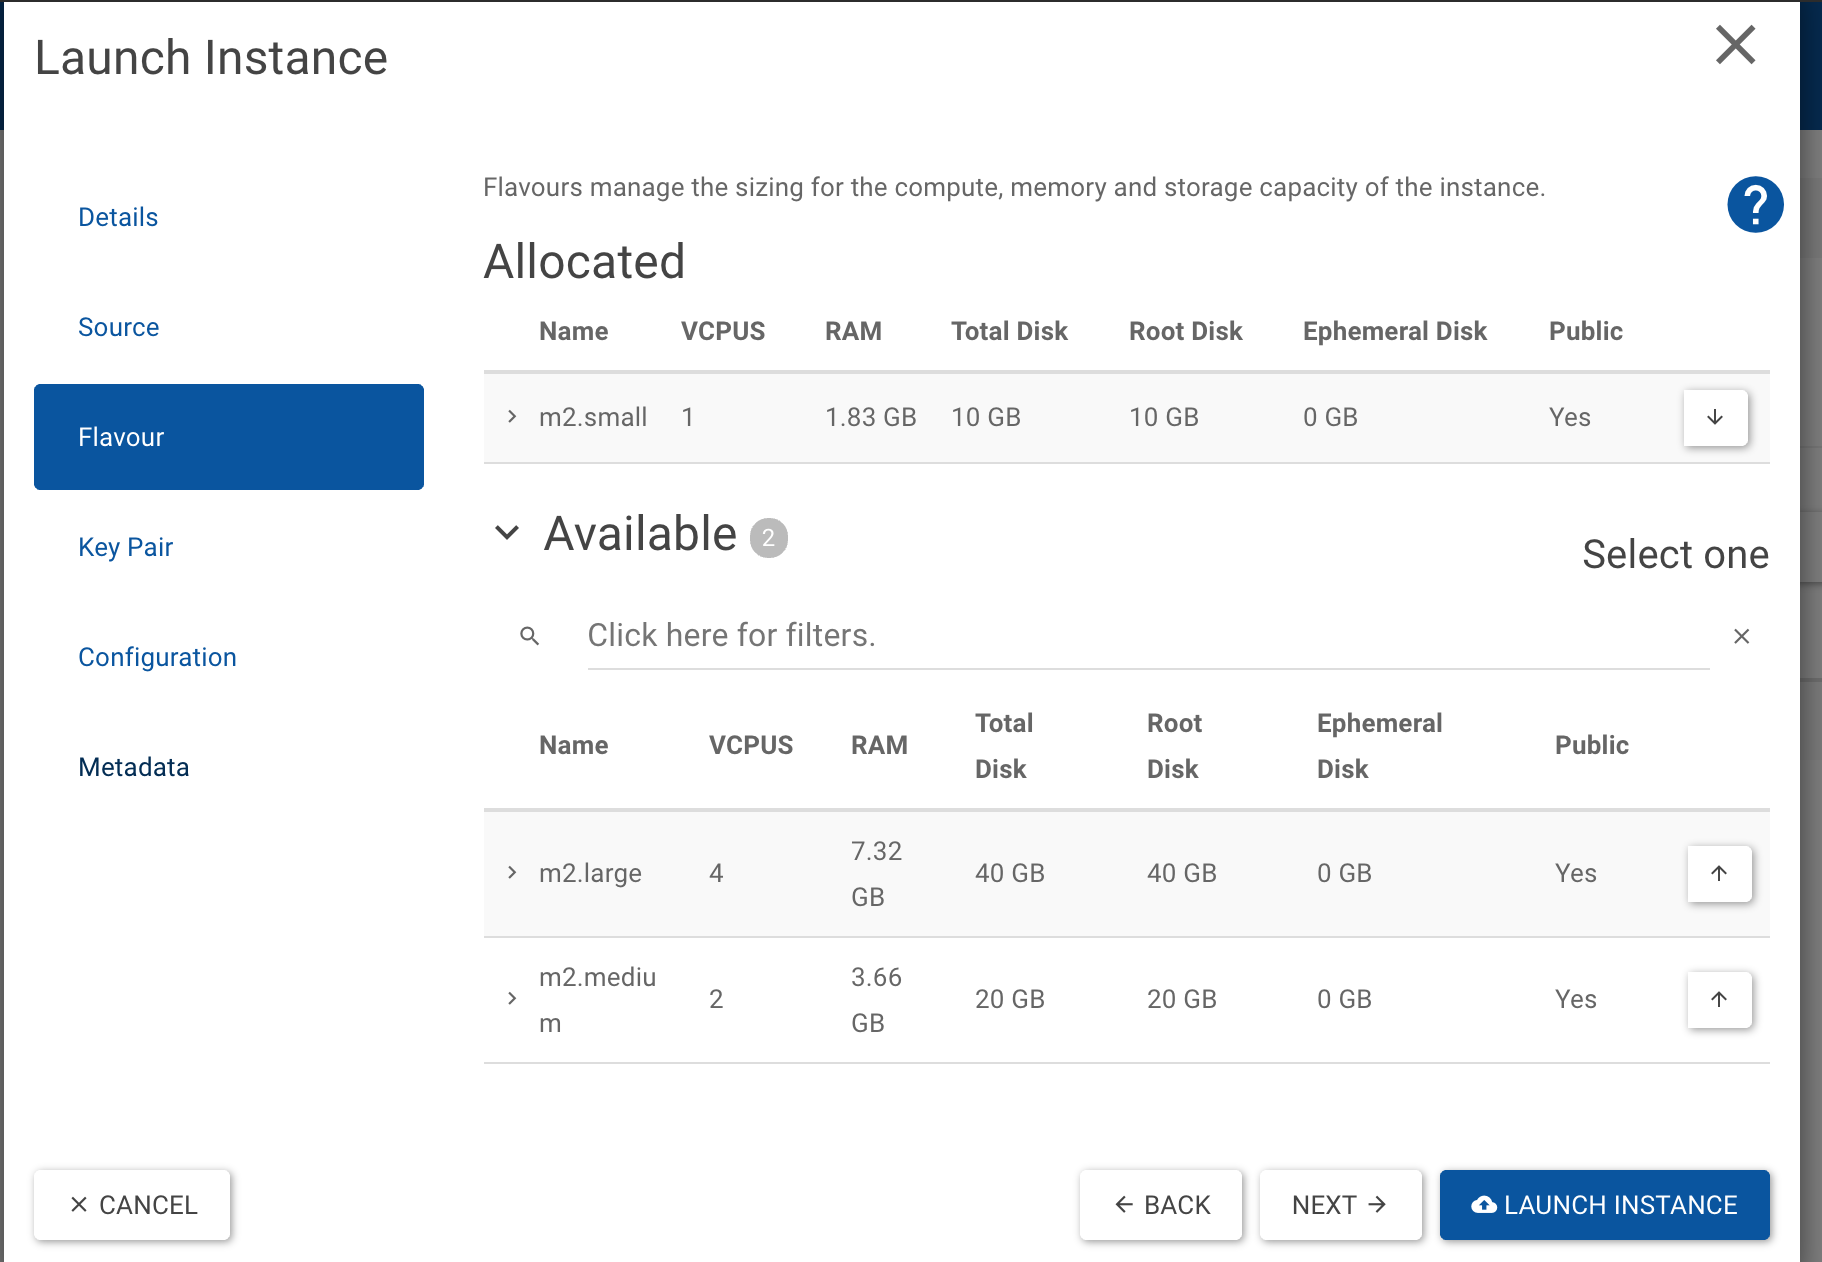
Choose a flavour
Here you can choose the number os CPUs, and memory you need, choosing between three possible sizes (small, medium large). For a fast creation, we recommend to request a small one.
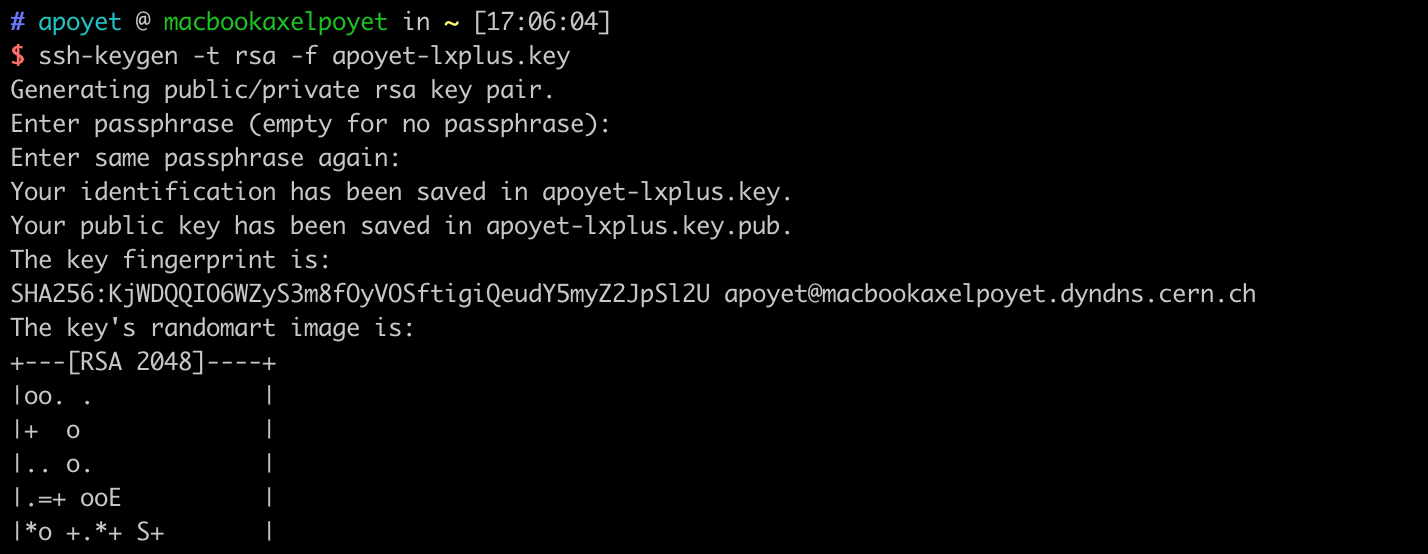
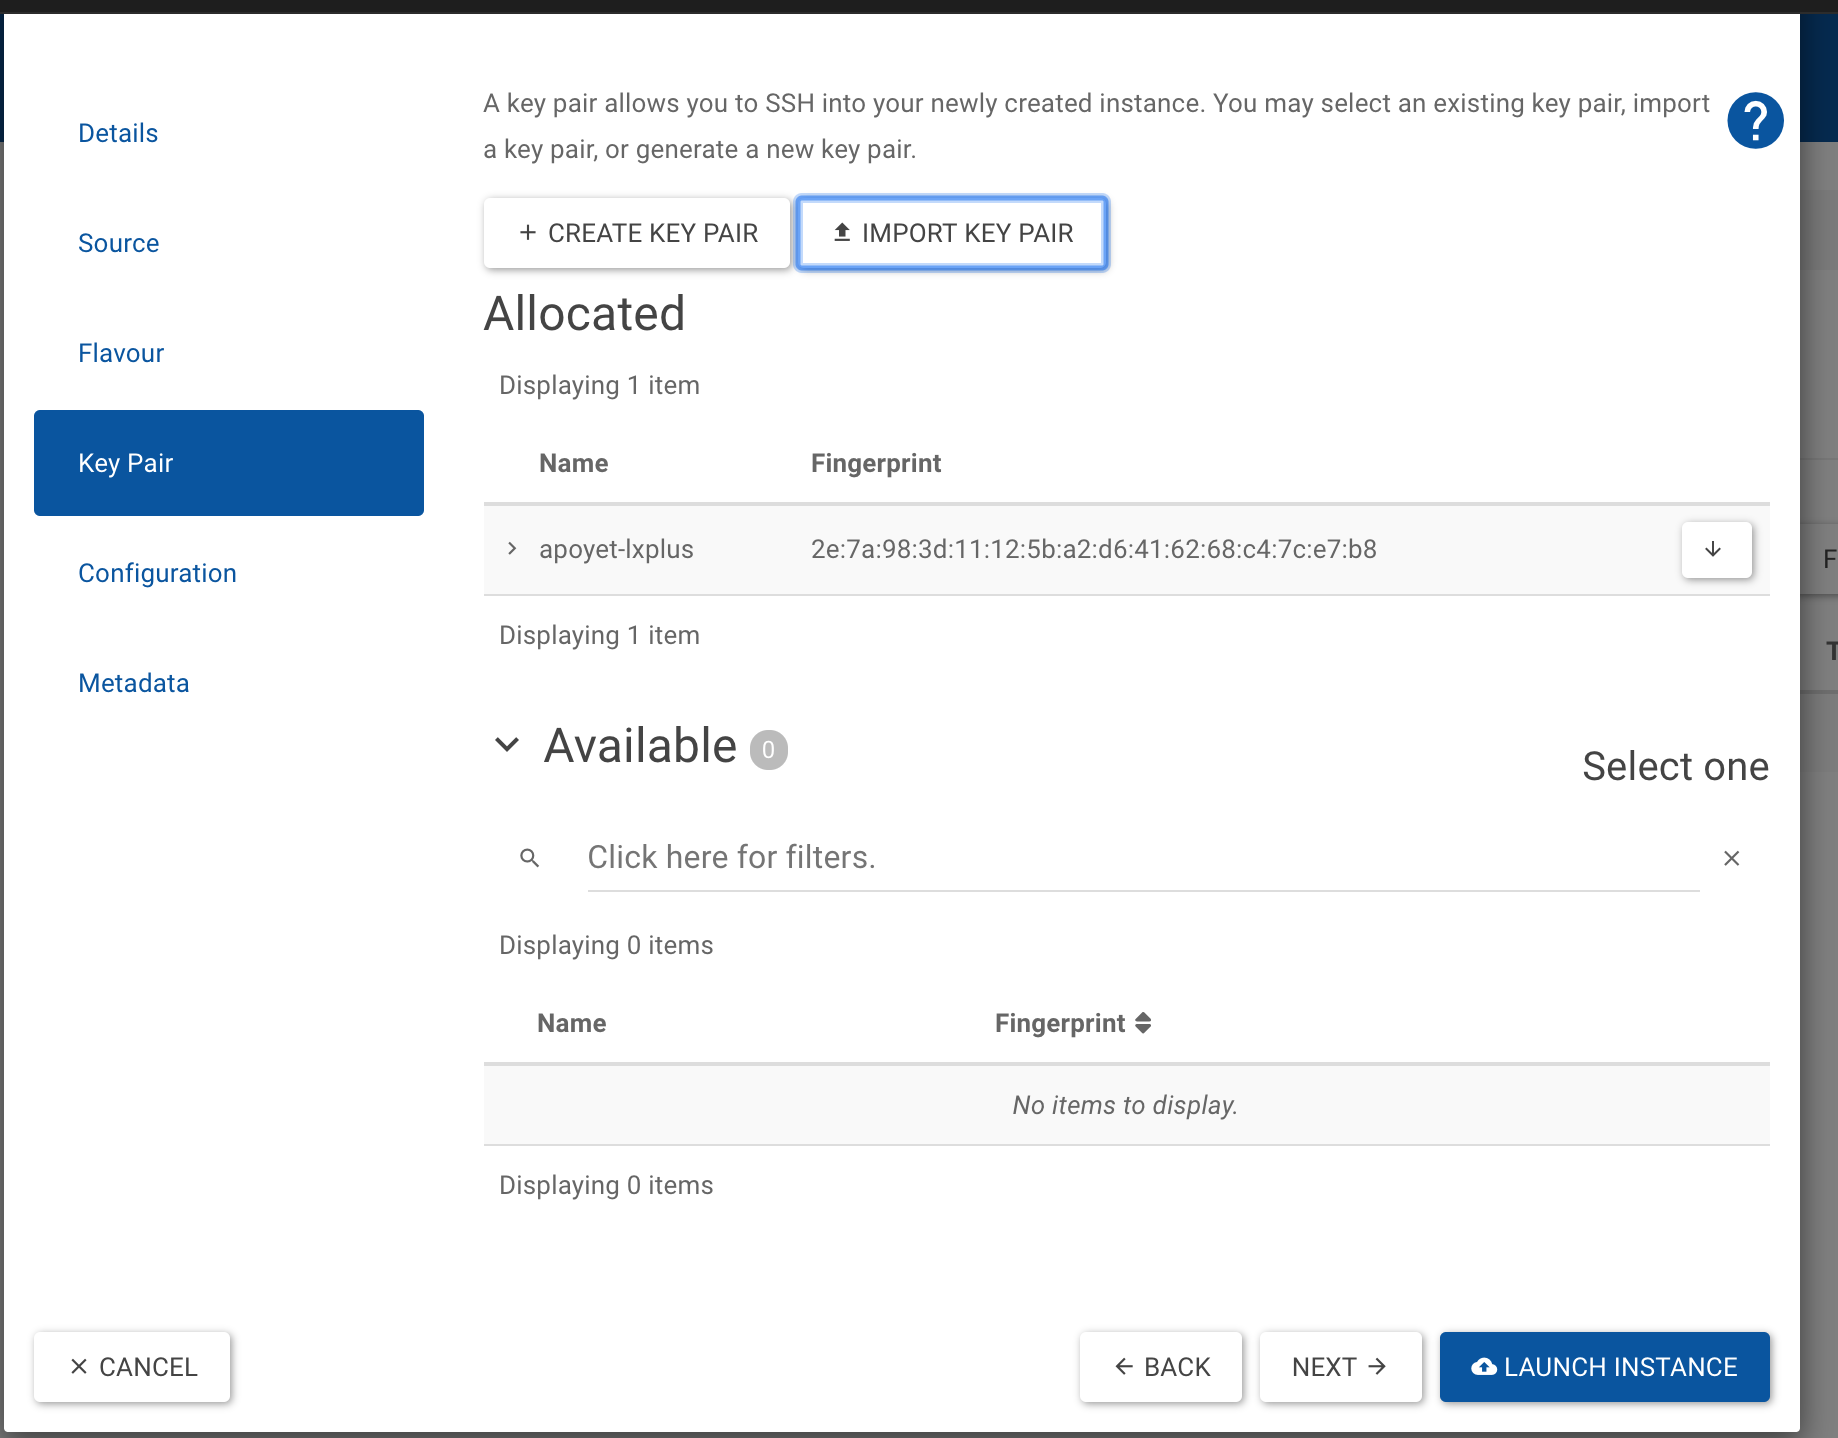
Create a key pair
In order to access your machine by ssh, you need to create (actually import) a key pair. For that, go to your terminal and issue the following command:
ssh-keygen -t rsa -f apoyet-lxplus.key
NB: apoyet-lxplus.key corresponds here to the name of the key I'm creating
Now import the key pair in your instance by clicking on 'IMPORT KEY PAIR' and copy pasting the public key you just created
And launch your instance (~20 min).
Step 2: Access your machine
Once the instance is running, you should be able to access it via ssh as root:
ssh -i apoyet-lxplus.key root@apoyet-lxplus
It seems that a user corresponding to your NICE account is already created.
ssh apoyet-lxplus
And AFS is already mounted.
Step 3: Mount CVMFS
Access your machine as root. And issue:
locmap --enable cvmfs
locmap --configure cvmfs
Step 4: Mount EOS
Access your machine as root. And issue:
locmap --enable eosclient
locmap --configure eosclient
kinit
aklog
You can install git with
sudo yum install git
You can install jvm with
sudo yum install java-1.8.0-openjdk
You can also install the standard development tools, for example,
sudo yum install centos-release-scl
sudo yum install devtoolset-8
To install the pysixtrack, sixtracklib, sixtracktoos,... please refers to this wiki.
Congratulation! You now own a virtual machine on OpenStack! You can access it through ssh and use it as lxplus. Simply note that HTCondor is not configured on this machine. IT does not provide support for that and we therefore don't recommend you to try to do so unless you are an expert.